A Winter Evening for Learning to Mend a Woven Basket
Learn to mend a woven basket by tracing a loose strand, choosing a gentle practice material, and making a modest cosmetic repair without risking its strength.
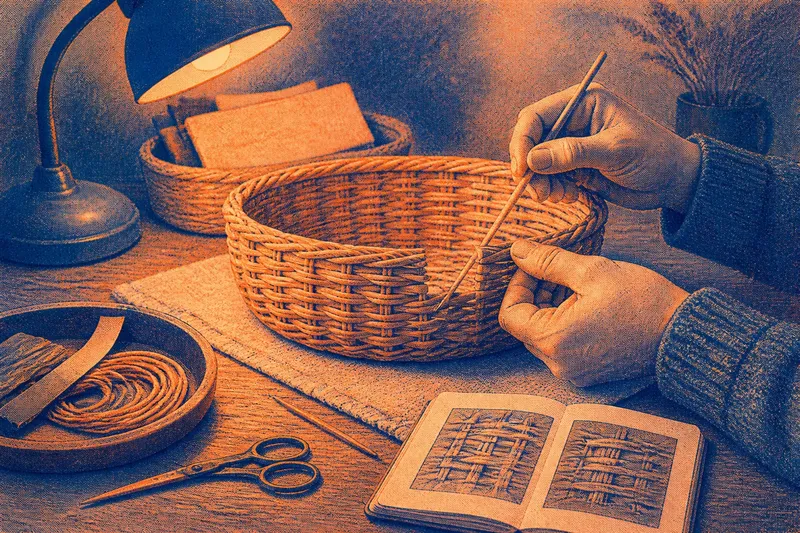
The common mistake when learning to mend a woven basket is to tighten a loose strand before tracing its route. That can push nearby weaving out of place and leave a patch that looks neater but is harder to correct. Start with a decorative basket, a steady lamp, and a clear view of the damaged section.
This kind of practice is for a modest cosmetic repair, not for restoring a valuable heirloom or making a basket safe to carry firewood, produce, or tools. Choose a piece you can set aside if the result is uneven. If it is old, fragile, or meaningful to your family, consult a basket maker or conservator before touching the weave.
Choose a basket that is safe to practice on
Use a shallow, lightweight basket intended for soft items such as cloth or greeting cards. A loose weft strand or small side opening offers a better practice problem than a cracked handle, split rim, or damaged base. Set the basket on a clear table under a steady lamp, and turn it slowly without pressing the damaged area.
Look at the inside and outside. Trace how the upright elements, often called stakes, cross with the horizontal weavers or weft. Names vary among weaving traditions, so focus on the strand’s path rather than getting every term right. Take a close-up photo of each side before making any changes.
Identify what has shifted or broken
A visible opening does not always mean a strand is missing. An intact weaver may have slipped out of its over-under pattern, or nearby strands may have spread apart. A cut, brittle, or crumbling strand calls for a different response. Use a blunt wooden skewer only as a pointer; do not lever strands apart.
- Observation: The strand is intact and has slipped out of the pattern. If: You can trace both its entry and next crossing, then consider a gentle tuck; otherwise: leave it untouched and choose another practice basket.
- Observation: A small gap is visible, but no end or break is clear. If: You can see neighboring strands displaced, then compare their pattern with the photo; otherwise: stop rather than inserting material into an uncertain opening.
- Observation: A strand is split, sharply cracked, or crumbling. If: The damage is plainly limited to a nonvaluable decorative area, then leave it as found or seek advice; otherwise: stop handling the basket and consult a repairer.
- Observation: Damage touches the handle, rim, or base. If: The basket is meant to carry anything, then treat the damage as structural and ask a basket maker; otherwise: keep it out of use rather than relying on a cosmetic patch.
- Observation: The material feels brittle or resists slight movement. If: The basket is not especially valuable, then set it aside as a display piece; otherwise: ask a conservator or experienced repairer before further handling.
- Observation: The strand’s route remains unclear from both sides. If: A photo or a neighboring crossing clarifies the route, then mark the intended path before proceeding; otherwise: stop and do not guess at the weave.
These checks are for deciding whether to attempt a small cosmetic tuck, not for testing strength. If you cannot tell whether a strand is loose or broken, treat the uncertainty as a reason to stop.
Choose flexible materials that will not force the weave
Set out small scissors, a blunt wooden skewer, a soft cloth, a tray for offcuts, and a few practice strands. Paper raffia, soft cotton cord, or a narrow strip cut from a paper bag can help you rehearse an over-under route on a nonvaluable basket. They may not match the original fiber or suit lasting use; their purpose here is to make the movement easier to see.
Compare a candidate strand with nearby weaving. If it is much thicker, it may push the pattern outward; if much thinner, it may leave the gap visible. Put it aside if it scrapes the basket or feels stiff. Avoid sharp needles, wire, strong adhesive, and soaking: glue can spread into fibers, while moisture may affect an unknown material or finish.
For an heirloom or a basket expected to carry weight, do not substitute a household material and assume the repair is sound. A qualified basket repairer can advise on matching the fiber and the work the basket must do.
Follow the existing over-under pattern
Lay the loose end along the route it appears to have followed. Use the blunt skewer to make only a little room, then pass the end over one strand and under the next to match the surrounding pattern. Work only across the damaged area, and tuck the end so it lies flat without crossing the rim or protruding into the basket.
Make small adjustments with your fingertips. If the replacement strand buckles, lifts a neighbor, or makes the wall bulge, ease it back instead of pulling harder. The aim is a plausible path with no new distortion, not a perfectly uniform pattern.
Say you find a small opening on the side of a lightweight basket used for folded napkins. The original crosswise strand is intact but has slipped out of its route. You photograph the area, trace the neighboring crossings, then use a soft paper strip to rehearse the pattern before tucking its end under a nearby crossing without tightening the wall. The expected result is a less open-looking gap from ordinary viewing distance; the tradeoff is that the paper strip is only a practice material, so the basket remains decorative and should not be treated as fit to carry a load.
Check the result by sight and position
Compare the basket with your before photos. Look from both sides and check whether the neighboring stakes remain aligned, the wall stays straight, and no loose or sharp end protrudes. Set it on a flat surface and observe whether it rests as it did before. Do not fill it, lift it by the rim, or pull the patched strand; appearance alone cannot establish carrying strength.
If the strand has shifted or the wall has bowed, ease the tuck back and reconsider the route. If fibers crack or resist movement, stop. Leave the basket decorative and unused for carrying until a qualified repairer assesses any damage that could affect its strength.
What should you do when the repair will not sit flat?
Should you pull the strand tighter?
No. Tension can move neighboring strands or split dry material. Ease the strand back, trace the pattern again, and stop if the route is still unclear.
Can ordinary glue hold the loose end?
Glue can stiffen fibers, spread beyond the repair, and make future work harder. For a practice tuck, leave the end unglued; ask a basket maker about a lasting repair.
Can paper raffia repair a basket for everyday use?
Not by default. It can help you learn the route, but it may differ from the original material and may not hold up to use. Keep a basket repaired with practice material decorative and lightly handled.
When should you ask a professional for help?
Stop if damage reaches a handle, rim, or base, or if several strands are broken or the fibers are brittle. Also seek advice before working on an item with sentimental or monetary value.
Keep only the notes that will help with this repair
Store the basket with its photos and any labeled offcuts, then make a brief note of the route you followed and whether the wall stayed flat. For instance, record “intact side weaver slipped under the next stake; paper strip sat flat after easing the tuck.” That gives you a specific reference if you revisit the same cosmetic repair, without treating the result as evidence of strength.
Learning to mend a woven basket is chiefly a matter of seeing how strands meet and knowing when not to force them. For a decorative practice piece, a small, neat tuck is enough; if the basket must carry weight or has value beyond practice, the useful next move is advice from a knowledgeable repairer.