Why a Sharpened Edge Meets Wood Differently
Learn why a sharpened edge meets wood differently, what to inspect before honing, and how to choose a tool and cut that suit the grain.
The common mistake with a stubborn cut is to push harder; that can bruise the wood, tire your hands, or make a tool harder to control. A sharpened edge meets wood differently according to its shape, condition, and direction of travel. Before sharpening, check whether the tool, cut, and grain are a good match.
Start with the job the tool was made to do
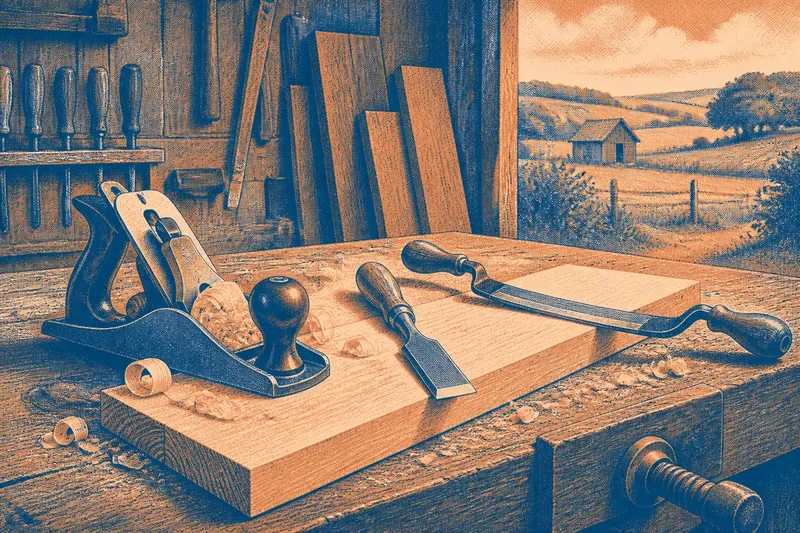
Identify the cut before judging the edge. A drawknife removes material as you pull it toward yourself; a chisel pares or chops with its bevel guiding the cut; a plane takes a thin shaving across a board. Each tool is designed to meet wood in a particular way. An edge suited to one task may be awkward or unsafe for another.
Look at the tool’s overall design, not just the bright strip along its edge. The blade’s curve, bevel, handle, and intended direction of movement all affect how it contacts wood. If you are unsure, check the tool’s markings or manufacturer instructions rather than using it for a job it was not designed to do.
Say you need to trim a thin sliver from a door edge. Imagine reaching for a heavy chopping axe because its edge looks keen. The axe’s head and cutting action suit heavier work; a controlled plane or chisel is a better fit for a thin shaving. The expected result is a more deliberate cut and less risk of removing too much material.
Match the edge and tool to the wood
A bevel forms a wedge that enters the wood, while the edge separates fibers. If the edge is rounded, nicked, or rolled, fibers may bend or tear instead of separating cleanly. Grain direction, knots, and twists also affect the cut, even when the edge is in good condition.
- For a fine shaving: Check that the tool is designed for controlled planing or paring; if it is, use it for the light cut, but if it is meant for heavy removal, choose a plane or chisel suited to the task.
- For rough shaping: Check whether the tool is designed to remove larger amounts of wood; if it is, use it for stock removal, but if it has a delicate finishing edge, select a more suitable rough-shaping tool.
- For a curved surface: Check whether the blade’s curve matches the work; if contact is broad and controlled, continue, but if a flat edge catches at one point, change to a better-matched blade.
- For a reflective strip at the edge: Check whether the strip is continuous or accompanied by a nick; if the edge is only lightly dulled, consider honing, but if damage is substantial or the bevel is uncertain, use appropriate sharpening equipment or seek experienced help.
- For tearing along the grain: Check whether the grain rises into the cut; if it does, take a lighter pass in another direction, but if the grain is not the cause, inspect the tool’s setup and edge.
- For a tool that chatters: Check whether the work is secure and the blade is set as intended; if either is loose or misaligned, correct the setup, but if the setup is sound, inspect the edge and reduce the cut.
Read the cut without confusing its causes
A smooth shaving or a cleanly separated chip suggests that the edge and cutting direction are working together. Tearing, chatter, or repeated resistance can point to a dull edge, an unsuitable angle, a poor setup, or difficult grain. These signs do not identify one cause by themselves, so check the work and tool before deciding to sharpen.
For a plane, look at whether the shaving is continuous and the surface is even. With a chisel, watch whether the edge pares without wandering or crushing the wood. If a drawknife catches or pulls unpredictably, stop and reassess the stock and tool position. Keep hands clear of the cutting path and secure the work in a way that suits the tool.
Imagine a board with grain that rises toward the end of a planned cut. You have a plane, a reflective strip at its edge, and a small tear on the surface. First, secure the board and make a lighter pass in the opposite direction; if the tear disappears, the grain direction was likely the immediate obstacle, and you can continue with light cuts. If the tear remains, inspect the blade under good light. A continuous reflective strip without a visible nick points toward light honing; a distinct nick calls for suitable sharpening equipment or experienced help. The result is a decision based on the cut and edge, rather than an assumption that every tear means the blade needs sharpening.
What should you check before sharpening?
How can you tell whether an edge is dull?
Under good light, look for a rounded or reflective strip at the edge, small nicks, or a cut that drags and tears despite sensible tool placement. If the edge looks intact but the cut still fails, check the grain and tool setup before honing.
Does a sharper edge always make a better cut?
No. The edge must suit the tool’s purpose, the wood, and the direction of the cut. A keen edge on the wrong tool can still produce a rough result or be difficult to control.
Should you sharpen a nicked blade right away?
Check the size and location of the damage and whether the tool is safe to handle. Light wear may respond to honing; a substantial nick or uncertain bevel calls for appropriate equipment or help from someone experienced with that tool.
Why does the same tool behave differently on another board?
Grain direction, knots, and moisture vary between boards and change how fibers meet the edge. Try a lighter pass and inspect the surface before deciding that the blade itself needs attention.
Use the cut to decide what to do next
Sharpening maintains an edge for a particular purpose; it does not make every blade suitable for every cut. When a cut goes poorly, check tool choice, setup, grain, and edge condition in that order. For a useful check, use a scrap from the same board or similar wood and make a light pass with the intended tool. The surface and shaving can help you distinguish a setup or grain problem from an edge that needs attention.
Keep the tool’s intended work in mind when you choose a sharpening method. A plane iron, carving knife, and splitting tool call for different edge forms, so follow the tool’s instructions if you are unsure about its bevel. This keeps maintenance focused on the cut you need rather than on making an edge thinner without a clear reason.